I will never forget my first encounter with kale chips. I had just flown a redeye from Abbotsford, BC to Toronto, ON, and as I stumbled through the airport at four in the morning on my layover, I couldn't help but notice that every store was selling the same thing: kale chips. Kale chips everywhere. This was my first impression of Eastern Canada. After a quick google search, I realized how easy they are to make from scratch and I haven't looked back.
There are two things to keep in mind when making your own kale chips: you must ensure the kale is dry before adding the oil, otherwise they will not be as crispy. And unfortunately, homemade kale chips don't have too long of a shelf life. I would recommend eating these they same day they are made. However, they are addictive enough that the lacklustre shelf life shouldn't be an issue.
The beauty of making your own snack food is that you can customize it exactly how you want it. In this case, I used my boyfriend's favourite seasoning: it's made by an oil company but seems to be a seasoning salt with cumin and cayenne pepper added. I've made them previously with regular seasoning salt and garlic salt for similarly delicious results. I've heard that Parmesan cheese is also a good topping, but I haven't gotten around to trying that yet. This is a pretty open recipe - don't be afraid to tailor it to your tastes.
Kale Chips
Author: Amanda
Difficulty: easy
Makes 1 batch (enough for two people)
Ingredients
- 1 bunch kale
- 1-2 tablespoons olive oil
- seasoning of choice
Directions
Wash the kale well and cut or rip into slightly-larger-than-bite-size pieces and discard the woody stems. Dry thoroughly with a clean kitchen towel. In a medium sized mixing bowl, massage 1-2 tablespoons of olive oil into the kale with your hands, ensuring that all of the leaves are evenly coated. Add the seasoning to taste, and mix again. Lay out on baking sheets so that the chips are not touching and bake at 300F for 15-20 minutes, until leaves are crispy and not wilted. Remove from pan and serve immediately.
Step-by-Step Photos
Wash the kale well and tear into pieces that are a little bigger than bite-sized. They will shrink in the oven as they roast. I like to line my mixing bowl with a clean kitchen towel and put the kale directly into the towel so I can dry it off thoroughly.
Fold the towel up and work it into the bowl to dry off the kale leaves. Kale is pretty tough, so you shouldn't have to worry about tearing your chips even if you are a little vigorous.
Once the kale leaves are dry, remove the towel and drizzle in 1-2 tablespoons of olive oil to taste (and depending on the size of your particular batch of kale). Use both hands to "knead" the oil into the kale - this helps to ensure the leaves are evenly coated which results in a more uniform chip. Add the seasoning, but use less than you you think you need. The chips will shrink down as they roast, concentrating the seasoning a little. Mix up the leaves again to ensure an even distribution of seasoning. At this point you can cover up the chips and store in the fridge to use the next day if desired - there is no discernible difference in kale chip quality.
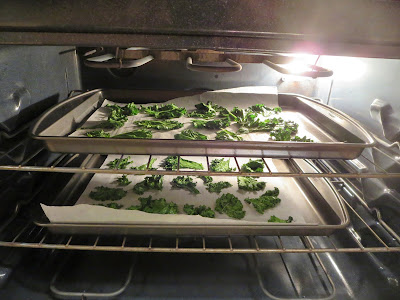
Preheat the oven to 300F, line a couple of baking sheets with parchment paper, and lay out the chips in an orderly fashion. My bunch of kale made enough for 4 pans of chips.
Roast at 300F for 15-20 minutes, or until the chips are crispy and not wilted.
The chips should slide off the parchment paper with ease and are ready for immediate, guilt-free snacking.


No comments:
Post a Comment