about

Two ladies who love food.

Monday, May 11, 2015

Cabbage Roll Lasagne


Every time I've ever tried to make cabbage rolls, they end up half fallen apart. While still delicious, I couldn't help but feel they were taunting me from the swirling depths of the tomato sauce, and that I was a culinary failure for not being able to replicate such a classic comfort food. I tried keeping the rolls together with toothpicks, or sandwiching them close together so they didn't have the space to dissolve, all to no avail. One day, while browsing Pinterest, I saw a recipe that essentially left the cabbage rolls unassembled, like a casserole. Suddenly, cabbage rolls seemed approachable again. And how can you get more comfort food than casserole?

I took this recipe and adapted it for my own purposes, which included using regular rice, adding a bell pepper since I already had one on hand I needed to use, and layering the meat with cabbage in a similar style to a lasagne. It maintains the essence of a good cabbage roll with the ease of throwing everything in a pan and into the oven. An ideal comfort food, even with a grandma's disapproval. ;)


Cabbage Roll Lasagne
Author: Amanda, adapted from The Primal Food Blog and Joy of Cooking
Difficulty: easy
Serves: 6+

Ingredients
  • 1 pound lean ground beef
  • 1 large yellow onion, diced
  • 2 cloves garlic, minced
  • 1 red bell pepper, deseeded and diced small
  • 1/2 cup white rice
  • 1 cup beef broth
  • 1 680mL can plain tomato sauce
  • approximately 1/4 head green cabbage, roughly shredded
  • salt and pepper, to taste

Directions
Brown ground beef in a medium sized saucepan on medium heat. Add onion, garlic, and bell pepper. Saute until onion soft and translucent, about five minutes. Add rice and beef broth, cover, and allow simmer 20-30 mins on low heat, until rice is cooked. Add tomato sauce, salt and pepper. In a lightly greased 9x13 baking dish, layer cabbage and meat sauce until dish is full. Bake at 350F for 30-45 minutes, and serve.

Step-by-Step Photos


Start off by browning a pound of ground beef in a medium sized saucepan on medium heat. Break up the ground beef into tiny pieces as it cooks.


Add the onion, garlic, and bell pepper. Saute until the onion is soft and translucent, around five minutes.


Add half a cup of rice and a cup of beef broth to the meat mixture, cover, and reduce the heat to low.


While the rice is cooking, prepare the cabbage. I ended up slicing/shredding a full half head of cabbage, and used about half of it for this particular recipe.


Lightly grease a 9x13 baking dish and layer cabbage along the bottom.


After 20-30 minutes, the rice should be fully cooked. Stir to ensure most of the excess liquid has been absorbed.


Add the canned tomato sauce, and adjust salt and pepper to taste. I added about 3/4 teaspoons salt.


Layer about half of the meat mixture on top of the cabbage.


Continue layering cabbage and meat mixture until the dish is full.


Bake uncovered at 350F for 30-45 minutes, until the tomato sauce is bubbling and the top begins to brown.


Serve! I love this with a healthy drizzle of sriracha, mmm!

Wednesday, May 6, 2015

Pancit


Pancit is a traditional Filipino noodle dish. As with most nationally loved dishes, there are a thousand and one different ways to make it. Growing up, my best friend's mom was Fillipina and would make pancit on special occasions. Vermicelli rice noodles, pork, cabbage, carrots, and this amazingly spiced sausage that really brought everything together. Honestly, eating pancit with their family is one of my fondest food-related memories.

So, of course, years later I tried to reverse engineer this delicious meal. I researched online and pieced together different parts of different versions of pancit, but I knew the key to success was in that mysterious sausage. One day, I stumbled on it at the Asian supermarket. I recognized it immediately, and couldn't wait to take it home to finally try my hand at pancit myself. The final result is pretty genuine, and I am so pleased to have this scrumptious, noodle-based comfort food whenever the mood arises.


Pancit
Author: Amanda, adapted from Maria
Difficulty: easy
Serves: 4-6

Ingredients
  • 1 medium pork loin
  • 6 lengths Chinese sausage
  • 1 large yellow onion, sliced into thin half moons
  • 3-4 medium carrots, cut into matchsticks
  • 4 cloves garlic, minced
  • 6 cups shredded green cabbage
  • 125g dry vermicelli noodles
  • 2 tablespoons vegetable oil
  • 6+ tablespoons soy sauce, to taste

Directions
Bring a kettle of water to a boil, and pour over dry vermicelli into an adequately sized pot or mixing bowl. Allow to sit for several minutes, then drain and set aside. Prepare the meats by slicing the pork into half medallions and the slice the sausage lengths diagonally. In a wok or large pot, heat up the vegetable oil and add the pork half-medallions, turning occasionally to ensure even cooking. Once pork is approximately half cooked, add the sausage to the pot. Continue to saute at medium heat until pork almost cooked and sausage is softened. Add onion, garlic, carrots, and cabbage. Saute until onions translucent and cabbage is wilting. Add the drained vermicelli noodles and soy sauce to taste. Combine well and serve.

Step-by-Step Photos


For stir-fry type dishes, your best bet is to do all of your prep work before starting to actually cook anything. Get all of your meat and vegetables ready so that nothing is compromised once you start bringing it all together. Slice the onions into half moons, mince the garlic, matchstick carrots, and chop or shred approximately 6 cups of cabbage. Slice the pork width-wise along the loin, and then cut those pieces in half again so they are not discs and are more suited to the size of the other aspects of the dish.


This is the Chinese sausage, the true star of the show. I found that half a package works perfectly, which is about 6 lengths of sausage. Unfortunately, I had used half previously and simply froze the rest of the sausage until I was ready to use it, so I don't have a picture of the package to show you. I was able to find it unrefrigerated in the Asian supermarket.


You'll also need vermicelli noodles. I used half of this package.


Prepare the vermicelli by bringing a kettle of water to a boil. Pour the water over the noodles in a heat-resistant receptacle. The noodles are delicate enough that simply sitting in the hot water should cook them sufficiently.


After a few minutes, they should look pretty soft. Drain them and set them aside until you are ready to use them with the rest of the dish.


Heat up a couple tablespoons of vegetable oil in a large wok (in this case I used a Dutch oven since my wok needs replacing). Add the pork pieces and stir them around so they cook evenly on all sides.


Once the pork appears to be about half way cooked and still pink in the middle, add the sausage.


After a few minutes of sauteing, the sausage should start to soften. Add the vegetables to the wok/pot and continue to saute, stirring frequently.


Add the cabbage and stir well to combine.


I ended up putting the lid on my Dutch oven, and the steam helped wilt the cabbage a little faster, but still stir it every couple of minutes to make sure that nothing burns to the bottom.


After a couple of minutes, the cabbage should start to wilt down. I prefer mine to have a bit of crunch in it still, but if you prefer a softer cabbage, you will want to let it saute a little bit longer.


Add the vermicelli noodles and soy sauce.


Stir well to combine the noodles with the rest of the dish and to avoid "noodle clumps."


Serve with extra soy sauce to taste.

Thursday, April 30, 2015

Chai Latte Drink Mix


I'm a sucker for a good chai latte. There's something classically inviting about the smell of cinnamon, ginger, peppercorns, and cloves that is downright intoxicating. Since I tend to prefer tea over coffee, some variation of a chai latte is usually my number one pick if I'm choosing to be indulgent at a coffee house. I've probably tried over a dozen different variations of chai latte, and if I'm ever disappointed it's usually because the drink is too sweet. And because the vast majority of coffee houses use a premixed chai base, it's neigh impossible to get a less-sweet beverage that isn't less-chai.

Clearly, the answer was to make my own. I've gone through phases of making my own "chai latte concentrate" over the years with varying degrees of success. This latest version may very well be my favourite. It's equally delicious hot or iced, and will keep in the fridge for at least a week (if it lasts that long!), ready for use at a moment's notice.

One of the reasons this recipe worked so well for me was because all of these spices I used I already had on hand. Don't feel like you have to use everything in order to create a delicious drink. Though I used honey as my sweetener of choice, this recipe is easily adapted to be vegan-friendly by using another sweetener, such as maple syrup. I am personally not a fan of agave nectar, and there seem to be conflicting reports on the purposed health benefits, but I suppose that's an option too if you prefer. Traditional Indian chai often only uses one or two "extras" in addition to the black tea, like ginger or cinnamon, and traditional chai is still amazing. After all, "chai" literally means "tea." You can't go wrong with whatever you decide.


Chai Latte Drink Mix
Author: Amanda
Difficulty: easy
Serves: makes approximately 1 litre mix

Ingredients
  • 4 black tea bags or 4 teaspoons loose leaf black tea leaves
  • 2 cinnamon sticks
  • 2 inches fresh ginger, peeled and sliced into thin discs
  • 1 teaspoon black peppercorns
  • 6 whole cloves
  • 1 whole star anise
  • 3 green cardamom pods
  • 1 teaspoon vanilla extract
  • 1 heaping tablespoon honey or maple syrup
  • 1 litre water

Directions
Place cinnamon, ginger, peppercorns, cloves, and star anise into a medium sized pot. Use the flat side of a knife to crack open the cardamom pods and add them to the pot with the water. Bring the pot to a boil, reduce to a simmer, and add the tea bags. Simmer for five minutes, then remove from heat and strain out the tea and spices. Add vanilla extract and honey. Cool and store mixture in a sealed container in the fridge for up to one week. To make a hot chai latte, add two parts chai mix to one part milk/soy, and heat until steaming on the stove or with a milk steamer. For an iced chai latte, add two parts cooled chai to one part milk/soy over ice and serve.

Step-by-Step Photos


First, gather your players. I used cinnamon, ginger, cloves, peppercorns, star anise, and cardamom. Other possible ideas could be freshly grated nutmeg or mace, allspice, or even a bay leaf. Use whatever aspects you love in a chai tea or latte.


Crack the cardamom pods open with the flat side of a knife, and add everything to a medium sized pot with a litre of water. Cover, and bring the water to a boil.


Once the mixture has come to a boil, reduce it to simmering (bubbles barely breaking the water surface).


Add four black tea bags or four teaspoons loose leaf black tea and set a timer for five minutes.


After five minutes has passed, pour the mixture into another receptacle using a mesh strainer to catch all of the tea and spices. If you were using ground spices instead of whole, I would recommend lining the strainer with cheesecloth or a paper towel so the spices don't end up as sludge at the bottom of your chai.


Stir in one teaspoon of vanilla extract and one heaping tablespoon of honey. If you have a sweet tooth, you could even add a second tablespoon to bring this up to your liking.


For a hot chai latte, bring chai mix and milk (2 parts chai and 1 part milk or soy) to "steaming heavily" on the stove. I don't have a milk steamer at home, but if you do that would be great to use. You don't want to boil the mixture together because that could cause the milk to curdle. For an iced chai, simply pour mix and dairy of choice over ice.


Enjoy.

Monday, April 27, 2015

Beet Red Velvet Sweet Rolls


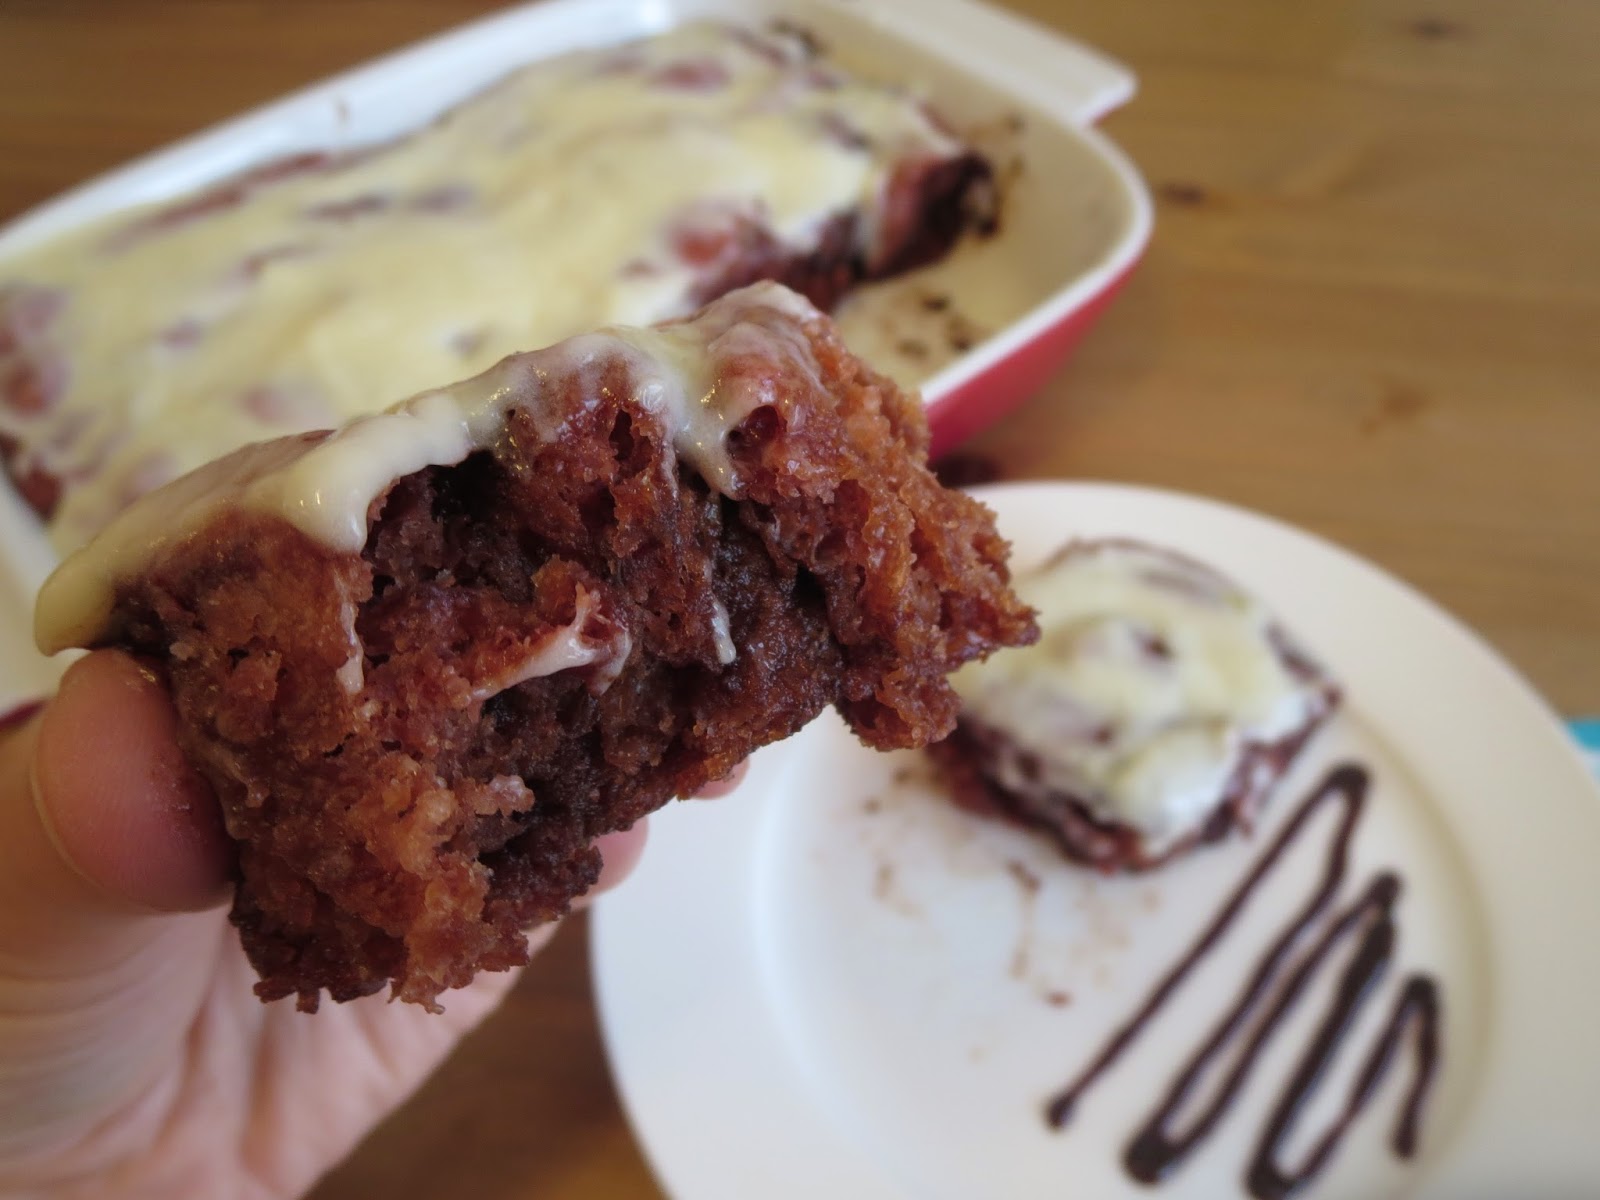
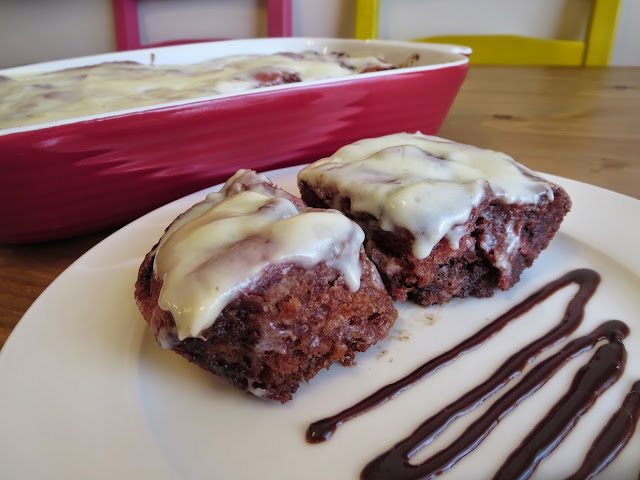
Don't let the name fool you into thinking these are a health food: these rolls are the definition of decadent. In fact, I highly advise baking them in containers you consider acceptable to give away (like foil pie pans) because you will be equipped to purchase all sorts of social favours with the help of these babies. They take everything you could want in a sweet roll and everything you already love about red velvet and combine it into a treat that could pass for breakfast about as easily as Reece's Puffs cereal.

The inspiration for these rolls came from a couple of different places. The Pioneer Woman has been a longstanding resource for everything cinnamon-bun-esque for me for years now, much to the enjoyment/chagrin of my coworkers since I usually bring them in to share. (As much as I love baking, I've grown past the days where it's remotely acceptable to think about crushing an entire cake myself over a weekend.) A few years ago when Red Velvet was becoming a big deal worthy of proper nouns, I tried my hand at it and was promptly disgusted at the prospect of using an entire bottle of red food colouring for one batch of cupcakes...and then realized that's very likely what all commercial bakeries are doing whenever I choose Red Velvet over, say, run-of-the-mill chocolate with cream cheese frosting.

I put off making my own Red Velvet baked goods for years partly due to the immediate apprehension I felt at consuming so much Red #5, but somewhere in my internet perusals I read an urban legend that before food dyes became widely popular, the birth of red velvet involved using beets to obtain that signature deep red colour. Filling that tidbit in my brainmeats for later, I finally remembered to pick up some beets on my most recent run to the grocery store. I started playing with the idea of a red velvet sweet roll, and finally took the plunge. Since starting this blog with Paige, I have tried some awful baking experiments that have never been published for various reasons, including coating the oven with a layer of caramel. And to be honest, I was so excited that these were turning out I skipped a step that will be addressed in the step-by-step photos so that you can learn from my mistakes. Thankfully, these treats are one afternoon away from making you the most popular person in the neighbourhood with minimal kitchen disasters involved.

Red Velvet Sweet Rolls
Author: Amanda, inspired from The Pioneer Woman's Sweet Rolls
Difficulty: easy
Serves: approximately 24 sweet rolls (about 3-4 standard size foil pie pans)

Ingredients
Dough
  • 1.5 cups milk
  • 1/2 cup sugar
  • 1/2 cup vegetable oil
  • 1 package (2 1/4 teaspoons) yeast
  • 1 cup pureed beets (about 3 medium beets, peeled, diced, boiled, and pureed)
  • 1/4 cup raw or Dutch processed cocoa powder
  • 3 3/4 cup all purpose flour
  • 1/2 cup additional all purpose flour
  • 1/2 teaspoon baking soda
  • 1/2 teaspoon baking powder
  • 1/2 teaspoon salt
  • 1/4 cup butter, melted, for pans
Chocolate Ganache Filling
  • 1/2 cup butter
  • 1 cup sugar
  • 4 oz dark baking chocolate
  • 1/4 cup milk or heavy cream
  • 1 teaspoon vanilla extract
  • dash salt (optional)
Cream Cheese Icing
  • 1/2 standard brick cream cheese (4 oz), softened
  • 1/4 cup butter, softened
  • 1 teaspoon vanilla extract
  • 1/4 cup milk plus additional to thin as necessary
  • 1.5 cups powdered sugar

Directions
For the dough: combine milk, oil, sugar in a medium pot and bring milk to a scald. Allow to cool until not hot to touch. Add yeast and allow to bloom for approximately five minutes. Add beet puree to mixture and stir well. Sift cocoa into first cup of flour and add flour and stir. Cover and allow to sit in a warm place until doubled in size, about one hour. After dough has risen, add additional flour, baking powder, baking soda, and salt. Roll into a 10x30 large rectangle on a well floured surface.
Prepare the ganache by allowing butter to melt into a small pot or saucepan with milk, sugar, vanilla, chocolate, and optional salt. Allow mixture to barely bubble, and set aside to cool until dough is rolled out. Measure out 1 cup of ganache (recipe makes approximately 1 1/4 cups) and spread over rolled dough. Carefully roll dough towards you starting from the furthest side using a "typing" motion with your hands. Pinch the dough together at the seam. Use a knife to make roughly 1 1/4 inch slices along the dough. Spread melted butter into pans and place rolls into pans, leaving some room for rolls to rise. Cover with a tea towel and allow to rise in a warm place for an additional 30 minutes. Bake rolls at 375F for 15-18 minutes, or start to appear darker brown at the edges.
While the rolls are baking, prepare icing by whisking with a stand mixer together softened cream cheese and butter until well blended and fluffy. Add 1/4 cup milk, vanilla, and approximately 1/2 cup powdered sugar. Continue to whisk in powdered sugar in increments. Add additional milk as necessary to thin icing to a pourable consistency. Pour icing on rolls as soon as they come out of the oven, and gently spread around icing as necessary to ensure rolls are coated evening. Allow to cool for approximately 15 minutes before serving.

Step-by-Step Photos


First things first, you will probably need to make the beet puree. This can be done the night before (which I did, and took no pictures since the lighting was crap) and left overnight in the fridge. I peeled and diced four medium beets, and boiled in enough lightly salted water to cover until very fork tender, which was about 20 minutes. Then, I piled them in a blender and added enough of the boiled-beet-water to allow to blend until it reached a puree consistency. Easy peasy. Maybe a total of 15 minutes of hands-on time altogether. You can probably get about a cup of pureed beets with 3 medium beets. Isn't that colour just gorgeous?


Once you have your beet situation under control, allow some milk, oil, and sugar to come to a scald on the stove on medium heat. Scalding means about-to-boil-but-not-boiling-yet, so you should keep an eye on it. Turn off the heat and allow to to cool until hot but not too hot to touch, which is super scientific and not at all open to interpretation. You'll also want to choose a pot large enough to allow the dough to rise, unless you're planning on dirtying another dish.


Once the milk mixture is somewhat cooled, stir in one package of yeast. After about five minutes, it should bloom like this.


Stir in the beet puree.


Add the cocoa and flour to the mixture and stir until combined with a wooden spoon. I naively added my cocoa separately without sifting, and had to work out a few lumps that could have been avoided by sifting the cocoa into a bit of flour, which is correctly reflected in the directions. Raw cocoa or Dutch processed cocoa is necessary here, as regular cocoa powder will compete too much with the red colour from the beets. Cover the dough and let rise in a warm place until double in size. I like to turn on the oven for a couple minutes, turn it off, and then let the dough rise there away from any potential drafts.
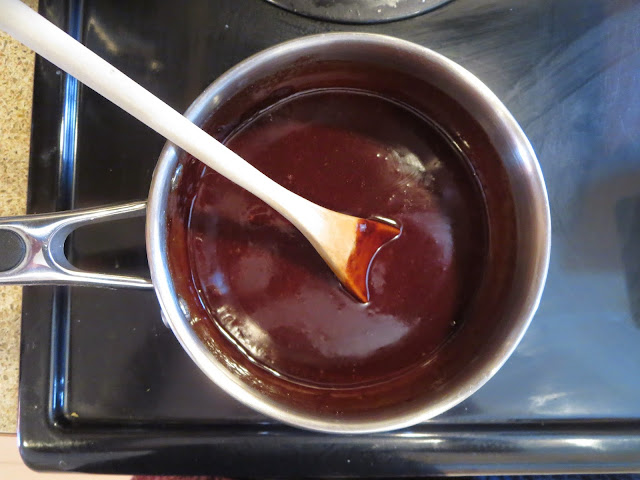

While the dough is rising, you can prepare the chocolate ganache filling if you wish. Simply melt butter, sugar, vanilla, milk (or heavy cream), and dark baking chocolate into a small pot on medium-low heat. Stir consistently and bring it to bubble for just a couple of minutes before turning off the heat. As it cools it will start to firm up, so you may want to warm it up slightly once the dough is risen and rolled out. Good quality dark chocolate makes a big difference here, so don't be apprehensive about using the good stuff.


Isn't that a happy looking dough? It was this step where I made my not-so-fatal flaw due to being so excited that the red colour was persisting so beautifully, and I forgot to stir in the additional flour/baking powder/baking soda/salt. Learn from me. This will help the dough firm up a little bit and make rolling it so much easier.


On a well floured surface, turn out the dough and roll it into a large rectangle - approximately 10 inches by 30 inches.


Measure out one cup of prepared ganache and pour over the rolled out dough. What to do with the leftovers? Sinfully garnish the rolls, use it as ice cream topping, eat it out of the pot with a spoon...there are a few options to choose from.


Use a spatula to spread the ganache around the rectangle evenly.


Carefully roll the dough towards you, moving from one side to the other with a typing motion with your fingers, pulling as you go. Warning: this will get messy. You will have hands covered in chocolate. That isn't a bad thing. My roll ended up not as pretty as it could have been if I supplemented with the rest of the dough ingredients, but thankfully this recipe is forgiving. (Thank you, Pioneer Woman! She has fantastic pictures and a likely better description of the dough rolling process if my explanation isn't enough.)


Pinch the seam together as you approach the end of the roll. Hopefully your roll of dough and chocolate is less floppy.


Use a knife to make slices about an inch thick. How many slices you make out of the roll will determine how many sweet rolls you end up with.


Melt about 1/4 cup of butter and spread it along the bottom of your baking dishes. I used this pan plus two foil pie pans (not pictured).


Place the rolls into the buttered pans for another rise. (The floppiness of my rolls is the worst here - again, you shouldn't have this problem if you remember the additional flour and add-ins.)


Allow for a second rise of about 30 minutes in a warm, draft free place (like the oven!). Bake at 375F for 15-18 minutes.


While the rolls are baking, make the icing. Use a stand mixer with a whisk attachment to cream together the butter and cream cheese until fluffy, about 3-5 minutes.


Add vanilla, milk, and a portion of the icing sugar. Whisk together, and slowly add additional icing sugar until 1.5 cups total is added. If necessary, scrape down sides with a spatula and add additional milk to thin to a pourable consistency.


Pull the baked rolls out of the oven.


And promptly smother them in frosting. Frosting hides the imperfections and makes all life problems go away.


Try to wait 15 minutes before serving to help the icing set and not burn your fingers off. These rolls are fantastic - rich, sweet but not too sweet, and decidedly "Red Velvet-y" without an entire bottle of food colouring.