Ever since I found The Pioneer Woman's sweet roll recipes in college, I've been hooked. I had previously been of the "yeah, cinnamon buns are pretty delicious I guess" camp, and now I am fully converted to "holy cow I never want to stop eating these forever." And it's all thanks to The Pioneer Woman.
I used her dough base and wanted to do something fresh and summery, a contrast to the Red Velvet Sweet Rolls I made earlier. Lemons always taste bright and like summer to me, and strawberries are juuust reaching the tail end of the season, so I knew I had to act quickly. (Even though I happened to use frozen strawberries. It just felt better to do it now, okay?) This recipe makes an astronomical amount of sweet rolls, so unless you're planning on sharing (and substantially increasing your popularity by doing so), half the recipe should be more than adequate. Foil pie pans are a great vehicle for baking these if you are planning on gifting some to friends/family/neighbours. If time is of a bit more concern, the dough can be made the night before and left to rise in the fridge.
Lemon Poppyseed Sweet Rolls with Strawberry Glaze
Author: Amanda, adapted from The Pioneer Woman
Difficulty: easy (though time consuming)
Makes: 2-3+ dozen sweet rolls
Ingredients
Dough:
- 4 cups milk
- 1 cup vegetable oil
- 1 cup sugar
- 4 1/2 teaspoons/2 packages yeast
- 8+1 cups all-purpose flour, divided
- 1 heaping tablespoon salt
- 1 heaping teaspoon baking powder
- 1 scant teaspoon baking soda
- 1/2 + 1/4 cup melted butter, for rolls and pans
- zest of 2 lemons
- 3/4 cup white sugar
- 2 heaping tablespoons poppyseeds
- 600g package frozen strawberries, thawed (or around 2 cups fresh strawberries)
- 1 cup white sugar
- juice of one lemon
- 1 tablespoon honey
- 1 cup water
Directions:
Combine milk, vegetable oil, and sugar in a large pot or Dutch oven. Scald the milk and allow to cool until just a little warmer than lukewarm. Sprinkle yeast over milk and stir in, and allow to bloom for approximately 5 minutes. Stir in 8 cups of flour until combined, and allow to rise for 1 hour in a warm, draft-free location. Add additional cup of flour, salt, baking powder, and baking soda. Divide in half, and roll out dough to 10x30 inches. Zest lemons and use your fingers to mix with sugar. Pour approximately 1/4 cup melted butter on dough and use a pastry brush to smooth out. Sprinkle half the lemon sugar over the rolled out dough, and sprinkle one heaping tablespoon of poppyseeds on dough. Roll the dough towards you, tucking it as it goes along to ensure a snug roll, and pinch the final edge into the roll. Pour 1/4 cup melted butter into pans, using a pastry brush if necessary to spread the butter evenly. Using a serrated knife, make ~1/2 inch slices along the roll and place into pans, being careful to not crowd so as to allow the rolls to rise. Repeat above steps with remaining half of dough. Allow rolls to rise for an additional 15-20 minutes, and then bake in a preheated oven at 375F for 18-20 minutes, until golden. While the rolls are baking, bring strawberries, sugar, honey, water, and lemon juice to a simmer in a pot on the stove. Simmer for 2 minutes then use an immersion blender (or carefully transfer to a regular blender), and blend into a syrup. Simmer to reduce the strawberry puree for ten minutes. As the rolls come out of the oven, ladle with strawberry glaze. It will bubble up the sides of the pan and sink in between the rolls. Allow the rolls to cool in pans, and serve.
Step-by-Step Photos
First, combine milk, sugar, and vegetable oil in a Dutch oven or a large pot. Bring it to a scald, also known as just before boiling but no bubbles have appeared yet. Turn off the heat and let cool until just-a-little-warmer-than-lukewarm. This is probably the hardest part for me. I'm bad at waiting.
Sprinkle the yeast evenly over the milk mixture. Don't just dump it in and hope for the best, because that's how you get yeast lumps in your sweet rolls. Nope, not the voice of experience at all here. If you like, you can stir or whisk in the yeast to dissolve.
Wait about five minutes to allow the yeast to bloom.
Add in the first eight cups of flour, and stir until all combined. Set in a warm, draft-free place to rise until doubled in size for about an hour. Usually I will turn on my oven for a couple minutes to get it nice and warm and let my dough rise in there.
While the dough is rising, you can make a lemon sugar out of the lemon zest and white sugar. Use your fingers to combine. It will feel a little tacky against your fingers and will be delightfully lemon-y. Set aside.
Once the dough has risen, add the salt, baking powder, baking soda, and one additional cup of flour. Stir until well incorporated.
Divide the dough in half. Roll out one half of the dough into a large, thin rectangle.
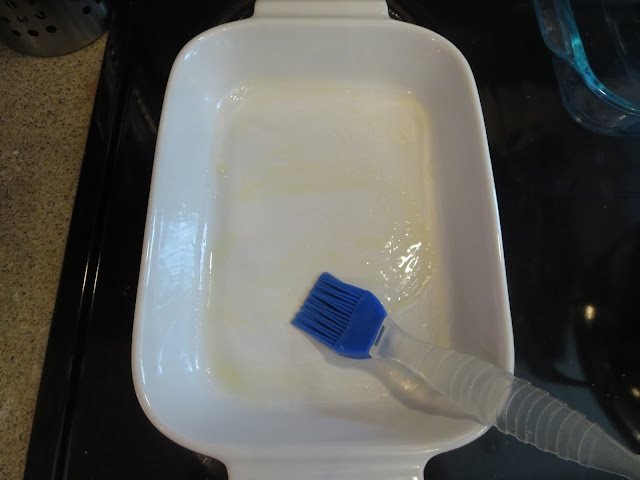
Pour 1/4 cup melted butter over the dough, and use a pastry brush (or your fingers!) to spread it around evenly, leaving a small edge on the long edges. Also brush melted butter into the pans.
Spread 1/2 of the lemon sugar over the rolled out dough. Also sprinkle one tablespoon of poppyseeds over the rolls evenly.
Roll the dough towards you, use tactile motions (like miming a keyboard), and tucking the roll as it goes to ensure a roll that won't fall apart when you progress. When you get to the final edge of the dough, pull it taught and pinch it against the rest of the roll.
Using a serrated knife, cut the dough into separate rolls, about 1/2 inch each. How thinly you slice the roll will greatly influence a) the size of your rolls b) how many rolls your recipe will yield. Place the rolls into buttered pans, being careful to not overcrowd the pan. Repeat above steps, and place the rolls aside to allow for a second rise of 15-20 minutes.
Bake rolls in a preheated 375F oven, switching between top and bottom oven racks half-way through if necessary.
While the rolls are baking, prepare the glaze. Allow frozen strawberries, sugar, honey, water, and lemon juice to come to a simmer on low-medium heat in a pot on the stove. Stir often.
As the strawberries cook, they lose their shape. Simmer for two minutes, then remove from heat temporarily and carefully puree mixture with an immersion blender. (You can use a regular blender, too. Just be careful to not burn yourself by overfilling the blender.)
Return to a simmer and continue to stir often and reduce for an additional ten minutes or so. I reduced mine until the rolls were baked completely.
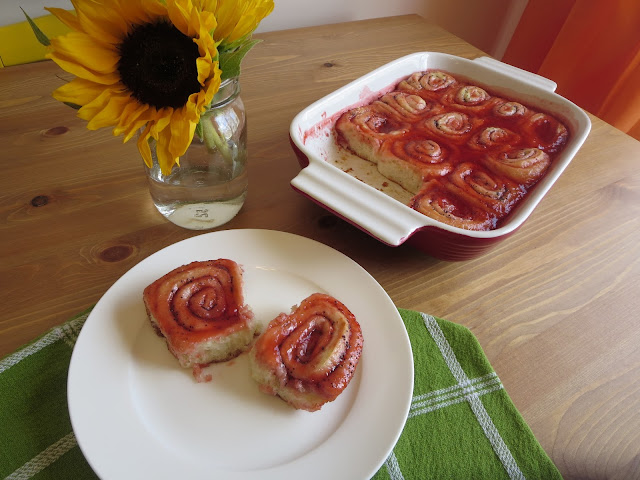
As the rolls come out of the oven, ladle or pour the strawberry glaze over the rolls. It will bubble up the sides and sink into the rolls, creating a delicious layer of sticky strawberry sweetness.
Allow to cool, then serve. Rolls will stay fresh for 1-2 days, but are best enjoyed the day they're made. I don't see why they wouldn't keep in the freezer, although I've never done it myself. Enjoy!


